Lice Combs: Why the Right Tool Makes All the Difference
If you’ve ever tried to remove lice with a drugstore plastic comb and wondered why it wasn’t working, the comb is probably your answer. Most parents don’t realize that the tool they’re using matters just as much as the technique. A bad lice comb doesn’t just slow you down — it gives you false confidence that you’ve cleared everything when you haven’t.
Here’s what you need to know before you start combing.
Not All Lice Combs Are the Same
Walk into any pharmacy and you’ll find lice combs packaged with over-the-counter treatments. They’re usually plastic, with teeth that are slightly too far apart to catch nits reliably. They look like they should work. They largely don’t.
The problem is physics. Nits are glued to the hair shaft and are tiny — we’re talking smaller than a sesame seed. Plastic comb teeth flex under pressure and widen just enough to let nits slip through. You might catch live bugs, but you’ll miss the eggs, and missed eggs mean the infestation continues.
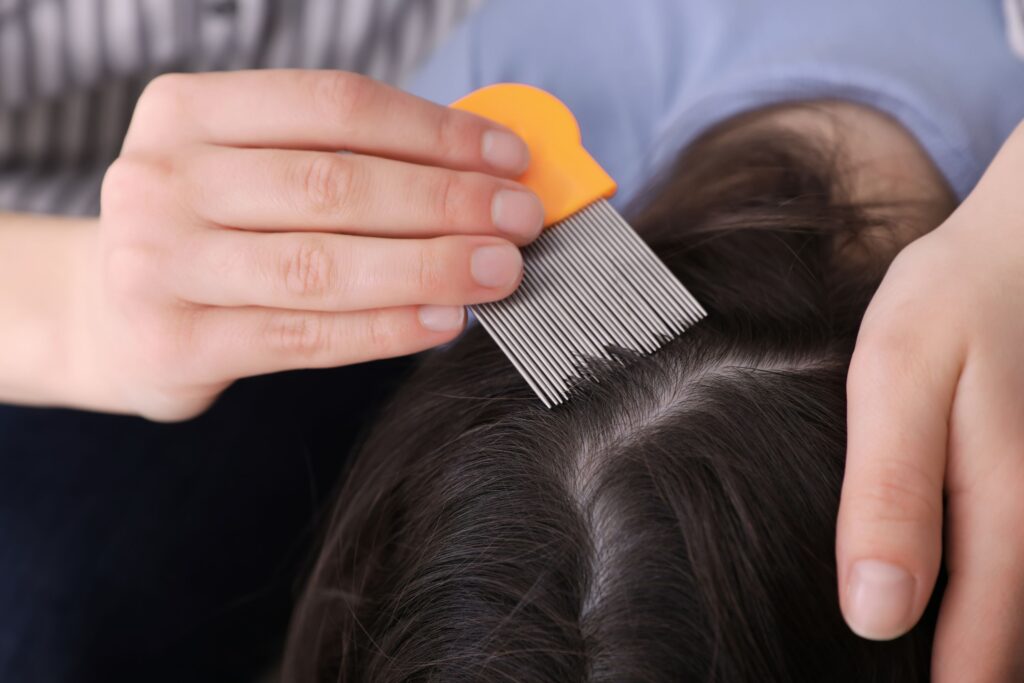
Why Metal Combs Are Worth It
A quality metal lice comb has rigid, micro-grooved teeth set close enough together to actually grip nits and pull them off the hair shaft. The tines don’t flex. They don’t skip. When you comb through a section and wipe the comb on a white paper towel, you can actually see what you’re pulling out.
The difference in results between a plastic comb and a good metal comb is significant — not marginal. If you’re serious about clearing an infestation, a metal lice comb is non-negotiable.
How to Use a Lice Comb Correctly
Having the right comb still won’t help if you’re using it wrong. The most common mistakes are rushing, skipping sections, and not working close enough to the scalp.
Do it right:
- Apply conditioner or detangler first. It makes combing easier and slows live bugs down so they’re easier to catch.
- Work in small, clearly defined sections. Use clips to keep the rest of the hair out of the way.
- Start at the scalp and pull through to the ends. Every stroke should begin as close to the root as possible — that’s where nits are laid.
- Wipe the comb after every single pass. Use a white paper towel so you can see exactly what’s coming off.
- Go through every section at least twice. Once is rarely enough.
How Often Should You Comb?
During an active infestation, daily combing for the first few days, then every other day for two weeks, is the standard recommendation. This accounts for the lice life cycle — any nits you miss on day one may hatch by day seven, and you want to catch those newly hatched nymphs before they mature.
Combing once and calling it done is one of the most common reasons lice come back.
When Combing Alone Isn’t Enough
Combing is the most important part of lice removal, but it requires time, good lighting, and a thorough approach that’s genuinely difficult to maintain when you’re doing it yourself on a moving, impatient child. Professional lice removal services use professional-grade combs and systematic technique to catch what home treatments miss — including the early-stage nits that are easiest to overlook.
If you’ve combed through and still aren’t sure you got everything, a professional follow-up check is the fastest way to confirm you’re actually clear.